
Most people use their laptops’ built-in cameras and microphones for Zoom/Teams/online meetings. But the limitations of these cheap cameras and mics do not make you look and sound good! If you want to convey your message well you should definitely consider upgrading your gear!
But how can you improve your Zoom appearance, and what combinations of options actually make sense? If you need to give a presentation or talk via Zoom, how can you make a good impression? A great image combined with trash can sound isn’t the right concept.
Here are my suggestions for four well balanced kits, sorted by increasing effort (and cost), but also with increasingly better looks and sound:
- Kit 1: The “Basic Setup” With a Standard Laptop
- Kit 2: “Simplistic Setup” — Perfect For Non-Techies
- Kit 3: “Conference Talk Setup”
- Kit 4: “Broadcast Quality Setup”
OK, let’s start with the looks. Obviously, this is not what we want:
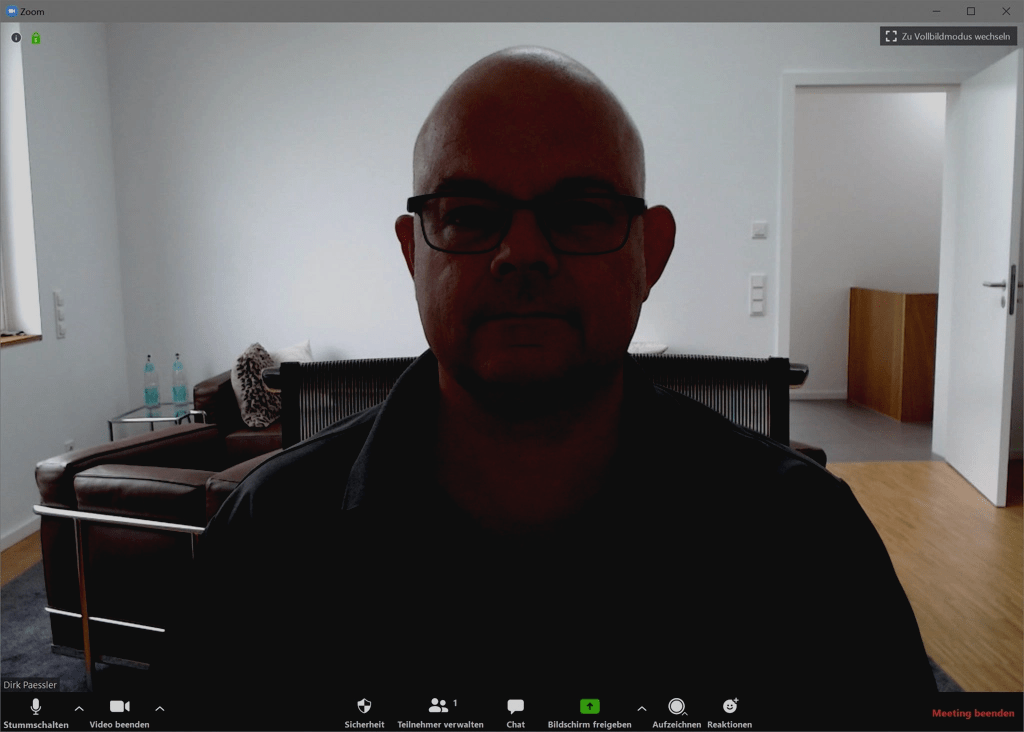
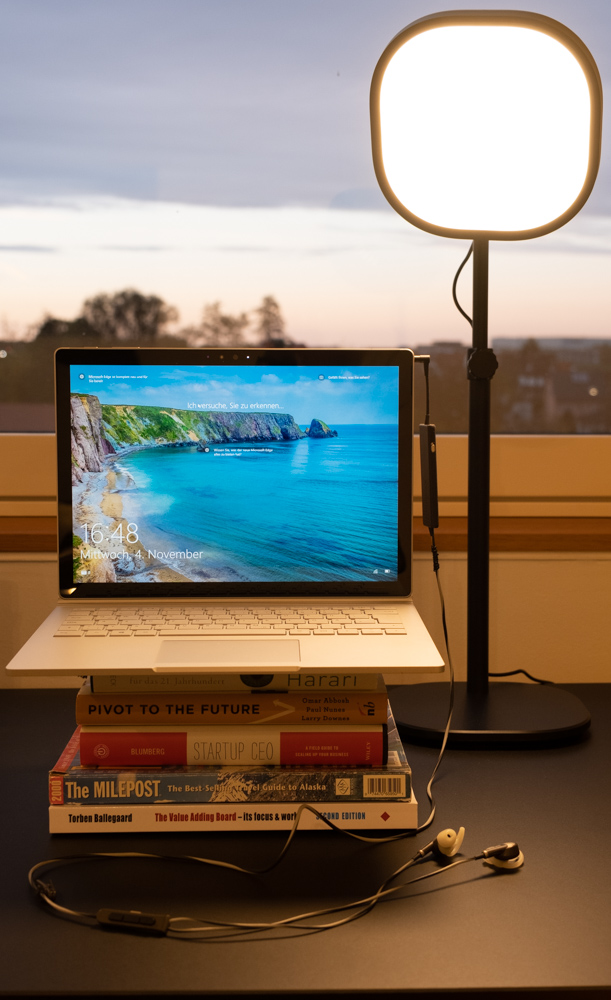
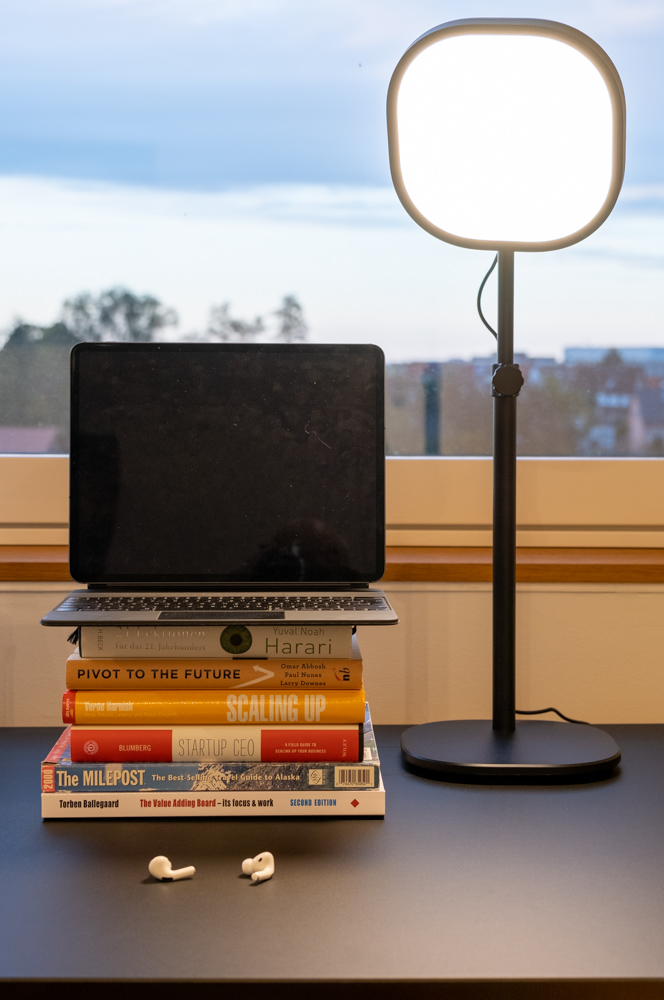
Now look and click on the following four images taken with the 4 kits that I will introduce below to see the differences. The images are screenshots of a Zoom conference recording while the lighting in the room was the same for all of them:

Kit 1: The “Basic Setup”
(built-in camera is too dark, image is dull; field of view is too wide, I had to sit really close to the laptop)
Kit 2: “Simplistic Setup”
(iPad Pro’s camera is “good enough”)
Kit 3: “Conference Talk Setup”
(person is separated somewhat from the background, interesting lighting, maybe a little too contrasty)
Kit 4: “Broadcast Quality Setup”
(blurred background and lighting draw attention to the person)
Kit 1: The “Basic Setup” With a Standard Laptop (€200+)
This option involves the least possible amount of buying additional “stuff”.
- Use the built-in camera (as I said, video comes last)
- Get one good light (Elgato Key Light Air €124) and place it behind the laptop, on the left or right behind the computer’s edge, not centered, to make the lighting more interesting
- Use a decent headset with a microphone: don’t spend less than €50 on it, preferable more than €100, good sound costs money: Sennheiser PC (USB, €68), Jabra Evolve2 (USB, €80), Bose QuietComfort 20 (headphone jack, €170), Surface Headphone 2 (wireless, €220), Sony WH-1000XM4 (wireless, €350).
- BTW, I prefer wired headphones/mics (battery is never empty)
Kit 2: “Simplistic Setup” — Perfect For Non-Techies (€800+)
For option 2 we are using two products from Apple’s walled garden, that are optimized for each other and are the easiest to set up:
- Get the latest iPad Air (€630) or the iPad Pro (€850), with Magic Keyboard
- Use the built-in camera (it’s good enough)
- Use Airpoids (€120) or Airpods Pro (€200) for sound and microphone (great sound!)
- Get one good light (Elgato Key Light Air €124) and place it behind the iPad, on the left or right behind the tablet’s edge, not centered, to make the lighting more interesting
- Remember to connect the iPad to the charger for long online meetings
- Consider connecting the iPad via Ethernet cable to your router instead of using wifi (requires an USB docking station with charging and network plug, like the Anker Power Expand €40)
- When you talk: look at the left edge of the screen where the camera is built into the screen bezel, then your listeners will experience you looking at them
Kit 3: “Conference Talk Setup” (€1500+)
This option is focused on providing good image and sound so the audience will want to listen to you even for a longer time. If you regularly give talks or longer presentations this will be good choice.

- Use a good camera:
- Option 1: StreamCam (€150) or Brio Webcam (€290) (both from Logitech, both offer better video than built-in cameras and are easier to setup than option 2)
- Option 2: Sony RX100 VI (€850) for much better video, connected to the USB port of the computer via the Elgato Camlink 4K (€130) module plus cable (much easier to set up than it sounds, mostly plug & play, here is a video that explains the installation)
- Put camera on a tripod, connect HDMI and a USB charger (for power), and place it behind/above your screen
- Get two good lights (Elgato Key Light Air €124) and place them left and right behind the laptop, move one a little further away or turn the light down a little so the lighting on your face is uneven, that looks better.
- Use Airpoids/headset (see kit 1) or a really good microphone: I am using the Yeti Nano (€120) on a dedicated mic tripod (€30)
Kit 4: “Broadcast Quality Setup” (€2500+)
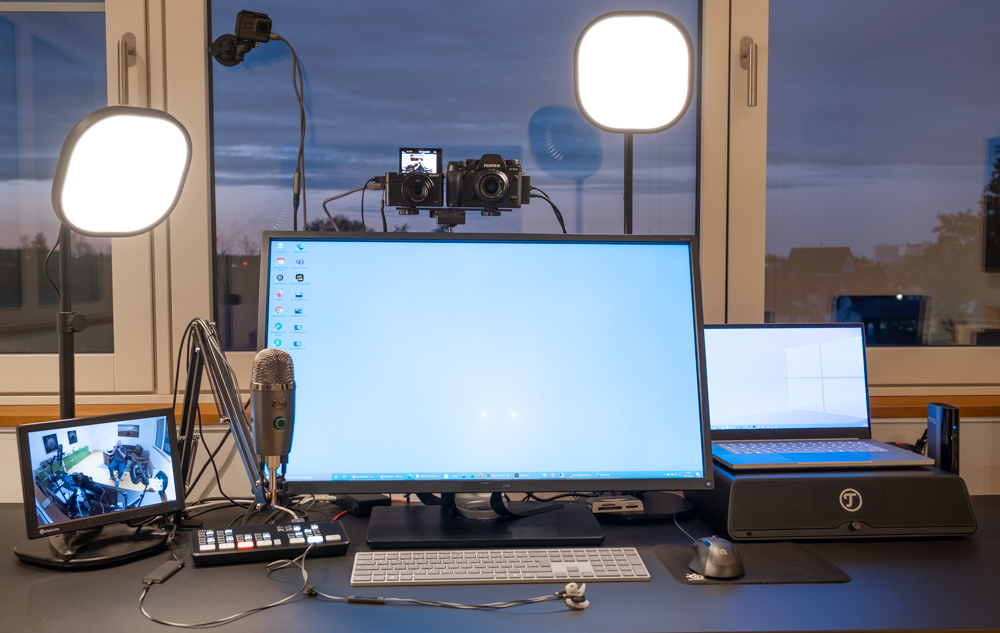
Yes, there is still room for improvement beyond option 3… Now we are actually close to setting up a small TV studio for your next Zoom conference.
There are many options in this field, I am using the following setup (which I leave permanently installed):
- Main camera: FUJIFILM XT2 (€1400) with 23mm f/2 lens (€300)
- Provides “bokeh” effect, i.e. the background is blurred and my head is optically separated from the background.
- Others use DSLRs or mirrorless cameras from Canon, Sony, etc.
- I am using the Sony RX 100 VI as my backup camera.
- Microphone: Yeti Nano (€120) on a dedicated mic tripod (€30), the Bose headset is plugged into the microphone’s headphone jack so I can hear/monitor my own sound, too.
- Lighting: 2x Elgato Key Light Air €124 with asymmetric setup
- Connection camera <> computer: ATEM Mini (€300), a 4 channel HDMI switcher on steroids, that connects via USB as a webcam to the PC.
- With that I can change the camera perspective with my 3 cameras plus a computer screen. Necessary? No. Fun? Yes! The Elgato Camlink 4K (€130) would be good enough, too.
- Computer: Razor Blade 15 Studio
- All zooming equipment can be turned on/off at once with a dedicated power switch.
- Plus I have set up the lighting of the room intentionally and all lights and cameras are set to the same color temperature (3000 Kelvin).
My Zoom rig looks like this:
In my upcoming blog post “The Four Commandments For Zooming” I will share tips and some inexpensive possibilities that will improve how others will experience you in a Zoom/Teams/online meeting.
Stay tuned.

You must be logged in to post a comment.